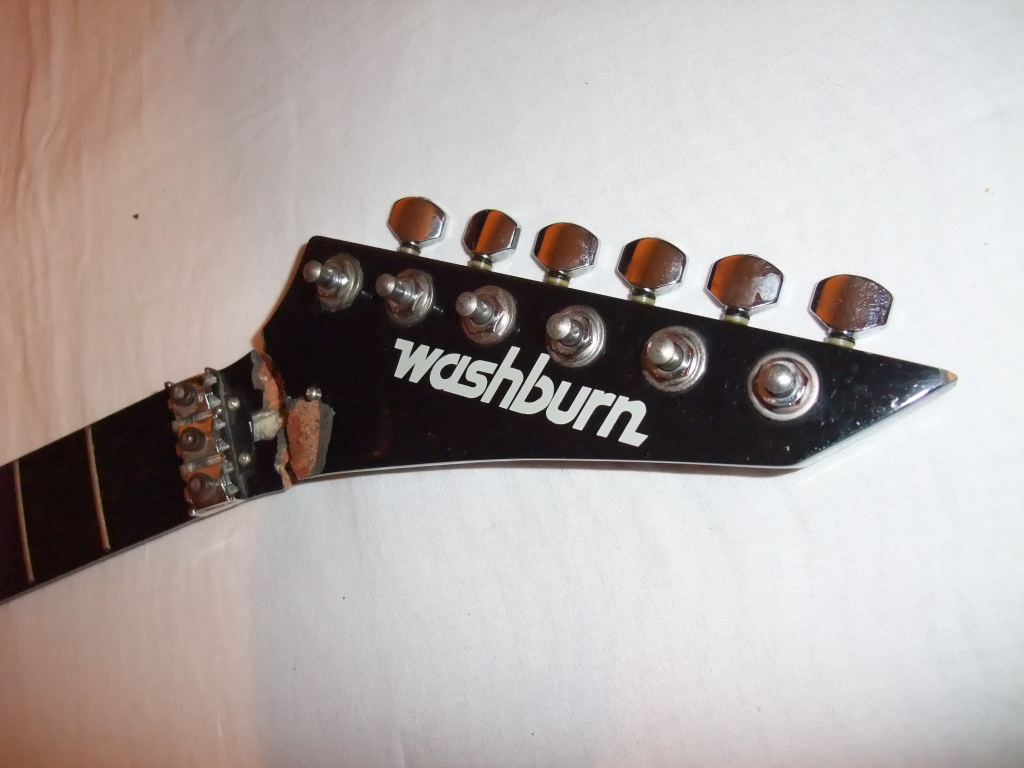
Showing posts with label washburn. Show all posts

Re-use

So, I used the jig I made ages ago for the Mockingbird and ground down the nut shelf on the RS10V. Nothing very exciting to look at but it's made the guitar much nicer to play.

I may need to go back later and shave it a little more but it'll do for now.

It's still very 'tinny' sounding though.

A little wobble

So I made myself a deep, oversize routing template for the RS10V by moving the acrylic one I had around. Annoyingly, the router chattered and put a little wobble in the front edge but I figured I could just manually skip it.

With this fixed to the front of the guitar using double sided tape I worked at getting it done. Sadly I failed to keep the router out of the wobble and ended up with a little wobble in the guitar body.

It's been done to two different levels, lower at the back so that the tremolo has a serious upwards and downwards range.

With it all back together it looks OK and the wobble isn't too obvious. Maybe I won't start on that custom guitar project just yet though.

It's now properly playable although the nut is still high and the nut shelf needs routing. As expected the combo of carbolite fretboard, Floyd Rose and odd EMG Selects means it has a very 'thin' sound. I may stick some Duncan Blackouts in it to compensate, although I've also got a JB/Jazz combo lurking in a box.

I'm still not sure what to do about the finish. It looks great in the photos with flash but is very dark and muddy in real life. It's scratched but not broken through and could probably be polished up OK. This would save me a refinish of the body but when I cut the end of the neck off I simply can't help but have to reshape the end. Which may lead to taking the finish off at least the neck.

Symmetry

Still not sanding.

When you start modifying guitars like this it's not just the gross problems like the stud position that catch you out it's also things like the shape of the tremolo route.

In the first photo you can see that the treble side of the bridge lines up perfectly with the edge but the bass side has loads of space. This isn't because I've put the bridge in the wrong place but because the bridge isn't symmetrical down the centre line of the guitar and the route is.

The route needs extending further 'south' so the baseplate doesn't hit the body and then deepening so I get more upward range on the tremolo.

My only attempt to do this kind of thing by eye with the RR2V went badly until I started to use a template and move it around. Clearing up the mess left me with a weird 'bathtub' route.

For the RS10V I want to try and keep it tidy and looking more like something a conventional guitar would have, but I have only got an asymmetric router template that is exactly the right shape and size for a Floyd Rose Original.

Flipping the template over, then moving it back slightly and doing so again looked like it would give me just what I need. Having tried this out on paper and done some measurements it checks out OK.

I've got a huge sheet of clear acrylic thick enough to make a new template using this method but I think I'm just going to cut it out of some old wood instead as I can't see me using this template more than once.

Still avoiding sanding

I've been tackling the RS10V today instead of the sanding.

First up I had to see what size hole I needed to drill for the bushes, they seemed a bit big for a 9.5mm but might be loose in a 10mm one. So I did a couple of test holes in a piece of scrap wood.

It turned out the 10mm hole was a fairly snug fit, so I drilled out the holes I'd marked previously.

With this done I loosely assembled it, using a clamp to hold the nut on so I could check that the studs were in the right place and the strings looked right. They're both rather close to the edge of the fretboard as the RS10V probably has a narrower neck than the donor BC Rich, but it looks OK to me.

So I went ahead and screwed the nut to the neck, roughly fitted a pickup so I could test the guitar and stuck the strings on.

Starting from an unknown position the Speedloader is a bit of a pain to set up. Mostly because the little grub hex screws in the saddles that are used for gross tuning are really fiddly to use.

Balancing these, the spring tension and the tremolo rest position took a fair old while, but in the end it's nicely sorted and close to intonated without having to move the saddles. Which shows I must have got the bridge in the right position.

I had to adjust the truss rod a couple of times as it had zero relief and buzzed badly at the lower frets, which is part of the reason this took so long.

Now I've done this I'm going to have to strip it down again to deepen and shift back the tremolo route. There's almost no upward movement on the tremolo as it hits the body. I'll leave this until another day as I'll give the neck a few days to 'settle'.

I also want to route a little off the nut shelf, the nut is currently excessively high. Thankfully I've already made myself a jig for this.

Slow progress on the RS10V

So I've had a busy weekend but decided to have a little go at the RS10V this evening.

I carefully drilled the pilot holes for the tremolo studs then waved the tremolo and routing templates at the body. I'm going to have to route the body a fair bit deeper for the tremolo to be any use as the Speedloader has quite a lot of gubbins at the back.

Despite this the guided router bit I have is quite deep so I'll probably still have to raise the router template up on blocks. I think I need to get another shorter bit. I also need some more varied drill bits as the tremolo studs look to fit an approximately 9.8mm hole rather than a 10mm one.

This conspired to make me give up on this for tonight, but I may have another look next weekend.

Marking up the RS10V

I spent a bit of time marking up the RS10V this evening.

I don't have a particularly good way to do this on a made up guitar, especially one with a carved top, most instructions seem to revolve around building a guitar from scratch and working from a centre line.

The way I've done this so far is to take a long straight edge and extend lines out from the edge of the neck across the body then measure an equal distance from the nut on both sides.

I did this on the RS10V and carefully checked it twice. It looks right by eye but then that doesn't mean much.

Next thing is to drill some small pilot holes and check it all again before drilling the holes out to their final size.

Would you mind not shooting at the thermonuclear weapons?

There's something very very serious about aluminium flightcases.

I feel like I should be using it to house a nuclear bomb, complete with flashing lights and a button that should never ever be pushed, not my old EC29.

Still carrying it around makes me feel like John Travolta in Broken Arrow, off to sell a nuke to the bad guys while delivering the best lines in the film.

As opposed to the man who made Battlefield Earth.

Plugging away

As the tremolo studs in the RS10V are in the wrong place for a Speedloader I need to plug and redrill them.

This is not the first time I've done this so I'm getting a lot more confident at it. The current holes were roughly 8mm but slightly 'serrated' from the bushes just as they should be. So I drilled them out to 9mm, being careful not to eat into the top surrounding the tremolo route.

Then it was just a matter of cutting some 9mm dowel, using a toothpick to spread some glue in the holes and tapping the dowels in. The dowels are slightly proud but I'll carefully route them flat when I route the top deeper, which will probably be necessary.

I've managed to source a cheap Speedloader guitar and I'm now waiting for it to arrive, so this project is moving slowly forward.

The photos make the blue quilt finish look really nice but the finish is so thick and dark it's hard to see. If the project to convert this to headless works out OK I'll try to thin the finish down with wet and dry in order to get rid of the nasty scratches then put a single clear coat back over the top. I'm hoping this will also improve the look.

The not so cunning plan

So, the plan isn't that cunning really. My friend JayGee said, on seeing a Speedloader equipped guitar, that it would make far more sense to use them to make headless guitars than what BC Rich did with them.

Here is the RS10V alongside my Speedloader Mockingbird and I've had a go at swapping the tremolo across to see how it goes together.

The nut fits quite nicely, but I kind of always expected it to.

The bridge isn't quite there though. At first glance it looks like it should work and the studs have a standard 74mm spacing. Before buying the guitar I also checked that the scale length of the RS10V is 25.5" (by measuring the RS8V) so I knew my stash of Speedloader strings should work.

Unfortunately in another bit of non-standard madness, Washburn placed the bridge studs 25" from the nut when common fitment is about 25.1"-25.2". This is opposite to the issue I had with the RR2V.

The Speedloader only works by being in a very very specific place relative to the nut, so as you can see the strings are all flapping around, not under tension at all. A quick measure up shows the bridge needs to be roughly 25.25" from the nut.

Despite this problem, having mocked up how this fits together I reckon this can be resolved and a Speedloader fitted. There's a fair bit of wood in the area of the bridge studs so moving them back should be practical. I'll need to route the top more deeply for the tremolo too, which will be interesting because of the carved top, but it's all grist to the learning mill.

Now I need to haunt eBay to pick up a Speedloader as I don't particularly want to strip down the Mockingbird. Whole BC Rich guitars fitted with one come up occasionally and often change hands for a pittance as they were really unpopular. Although it's a little random and sometimes you get a couple of people who fancy one bidding against each other so the price goes right up.

Washburn #13 - 'RS10V' blue quilt

The RS10V is a Washburn cut from the same cloth as my RS8V but is the fancier model with a quilted top and there are abalone inlays in the composite fretboard.

Electrics and so on are identical but this has a different tremolo. Instead of the double locking 600T setup, this has one that doesn't lock at the bridge. It looks like a standard Floyd Rose style bridge but the strings pass though the saddles from the back with the ball ends intact.

I've watched a few of these come and go on eBay and this is the first cheap one. I really like the RS8V which is why I've been keeping an eye on these.

There is a reason for it being dirt cheap, which should be pretty obvious.

I have a cunning plan.

Wear your ply with pride pt. 16

Finally I've finished this project.

It was a bit of struggle at times, but I do this as a learning exercise. If I just wanted a nice wood finish Rhoads I could have bought one. Well, assuming I could find one, Jackson don't actually make one in a plain wood finish.

I was lucky the wood of the top ply I revealed on sanding it was fairly attractive, it could have been nasty, all full of knots and filler.

The 'terrace' tremolo inset I had to do to rescue it after shifting the tremolo forwards is a little odd looking but not totally stupid.

Having taken the finish off the face of headstock it's cleaned up pretty nicely and the waterslide decal worked great after a couple of false starts.

The real reason I saved this though is that the neck is really nice to play and the single coils seem decent.

Wiring the pickups up in series has made a real difference, especially if you do things like use the neck single coil with one coil of the humbucker. It's not like a strat, but much warmer and like a neck humbucker without being at all muddy because the bridge lightens the tone.

I made the humbucker coil split so you can select which coil you use. Used on it's own you can get a choice between the real icepick sound of the south coil or a slightly more usable north coil. Then when used with the other pickups, swapping which of the coils you use doesn't make a massive difference in sound but does mean it can be hum cancelling with either the neck or middle pickup.

The cheap Iron Gear Steamhammer humbucker is quite high output but that just means each coil is pretty well balanced with the single coils and with everything on in series it's kind of like having two standard humbuckers.

Using the two single coils together is very reminiscent of a neck humbucker.

It's really worked out well. But for the fact I think having mini switches looks nasty and is hard to use quickly I'd be doing this on all my future projects where practical.

So I'm going to sign off on this one for now and start looking at the Goth Explorer. I may have to set this up again as it's a bit rattly, but I want to play it some and let it 'settle'.

I kind of want to continue the 'terrace' theme by making insets for the switches and pots but it's not worth tearing it to bits again just now.

Wear your ply with pride pt. 15

So here I am trying to undo my mistakes.

I dismantled the guitar and taped the body up so I could mark out and drill the new holes for the tremolo bushes. It became immediately obvious they would be dreadfully close to the bridge pickup route. They wouldn't break through, but the route needed for the plate that supports them could easily and without that plate there just wouldn't be enough wood to support them.

So I merrily drilled away.

Once the holes were in place the route for the sustain block had to be moved forwards too.

Then the 'inset' for the tremolo base plate.

Which broke through into the pickup route.

Which also leaves me with a gaping hole on the treble side previously needed for the sustain block.

Also, the base plate inset I'd previously routed by eye using a simple straight edge didn't 100% match up with this new route I did with a template and looked godawful.

So I used a profile bit to add an second terrace to the tremolo inset, it's the only thing I could think of to do to tidy it up.

All the while doing this I was quite despondent about the fact this was probably going to look awful. Still I persevered and put it back together once I'd finished hacking at it with my router.

I was pleasantly surprised, I did seem to have managed to mark out the studs in the right position and the guitar intonated fine.

The great big tremolo inset is a bit odd looking and not something you'd expect on a production guitar but it's not totally awful.

The fact the bridge pickup surround almost butts up to the tremolo baseplate hides the fact the pickup route has been broken into. There's maybe 0.5mm between the two.

So, happy with the fact it's not a total disaster, I've taken the tremolo out again to put some Danish oil in the inset. Maybe tomorrow I'll get it all back together properly, set it up fully and finally play it.

Wear your ply with pride pt. 14

I have made a very wrong assumption.

If you were Washburn in the 80s and you were going to go for a minor redesign of the Floyd Rose licensed tremolo, I kind of assumed that despite changing the stud spacing for it you'd leave the other measurements pretty much intact.

I was wrong.

The RR2V is impossible to intonate correctly, the tremolo is simply too far from the nut. I thought it sounded dead off and the string tension felt weird when I strung it last night.

A very quick wave of a yardstick at the guitar shows the studs to be pretty much dead on the 25.5" scale length from the nut. Conventional Floyd Rose studs would be about 25.1" away. You can probably see from the photo of the two tremolo base plates side by side that the knife edges on the 600-T are much further back. Or alternatively, the saddles much further forward.

I can sort of imagine a reason for this. If I've got my mental picture of the tremolo action right this would mean the intonation point moves closer to the pivot point. Which feels like it should make things more stable/subtle but offer less range.

So I've got to undo a load of the work I've done, plug the holes, redrill them closer to the nut and take a router to the top again. I may even need to take a router to the spring cavity underneath.

It could have been worse, the studs could have been too close. Which would have been hard to rectify. Although I'm yet to actually work out whether bringing the studs forward will make them too close to the bridge pickup cavity.

As I've routed an inset in the top this will now be in the wrong place. The only remedy I can think of for this would be to route it deeply with a profile bit to make a 'feature' of it.

Or maybe my vague notion to make a new body using the original as a template just got a step closer. No matter, the whole point of this turd polishing exercise was to get better at shining those turds as preparation for actually laying one of my own.

Wear your ply with pride pt. 13

Well I came home with the machine heads for the RR2V in my bag after a night out so I couldn't resist putting it together and stringing it up.

It's desperately in need of a setup and the intonation is way off, but I think it's looking pretty kick ass. Quite a transformation from the 'barn find' state I got it in.

Wear your ply with pride pt. 12

So, after a couple of false starts where I damaged the decal I've finally got the finish on the headstock sorted out. The machine heads are on the way and I hope I can actually get this one polished off by the weekend.

Wear your ply with pride pt. 11

Having started to sand back the headstock to remove the logo I decided to have a go at the dirty mark in the wood at the tip of the headstock, which was making it a bit ugly.

It wasn't clear if it was a fault in the wood or dirt so I just started sanding gently. It looked like it was going away so I kept sanding until it had mostly disappeared. This showed up that I hadn't really sanded all the grain filler off the headstock anyway so I've had a serious go and taken it right back to the bare wood. I hope. This has got rid of the nasty mark anyway, which is good.

This has also exposed the 'reverse scarf joint' in the headstock but as I'm happy showing off the fact the body is made of plywood anyway that really doesn't matter.

Having set the new headstock logo to dry I changed the tremolo 'claw' and screws. The old one protruded from the body stopping the cover fitting properly.

I've also wired up the electrics but until I get it back in one piece won't know if the single coils and humbucker are in or out of phase with each other.

Some new black Grover mini-rotomatics have been ordered along with a jackplate so any chance of getting it together this weekend has gone out of the window. This is probably a good thing as it'll stop me rushing the finish on the headstock. I've already had to try a third time with the logo because I went to put the oil over the top too soon and it cracked.

Wear your ply with pride pt. 9

This evening I started putting the pickups back in the guitar but before I passed the wiring through, shielded the control cavity with some aluminium foil tape. It's been done in two pieces so I'll use a solder tag to make a good positive earth connection with it.

Once I did this I messed about with putting a logo on the headstock. As I've no artistic skill whatsoever I took a Washburn logo that Brad Brunette from the Washburn forum had made by scanning the headstock of his Dime Stealth and removed all the Dime related stuff. Quite how he held the headstock of a guitar on a flatbed scanner I don't know, but it's a nicely done logo in a decent resolution. It's the 90s 'Frankenstein' style Washburn logo as seen on the Steve Stevens signature models. Which I prefer to the modern script logo or the 80s angular one the guitar started with.

I pasted this in a variety of sizes into a Word document, printed it out and offered a couple up to the guitar. It seemed to look OK so I printed the same thing out onto some 'waterslide' laser printer decal sheets I bought some time ago for exactly this purpose. These are a little bit flaky but most of the logos came out OK.

So, in a throwback to my childhood of making plastic model kits I soaked the logo in warm water and slid it onto the headstock. I messed the first one up, managing to crease it but as I'd printed a whole sheet of the things just cut out another one and went for it.

I reckon the end result looks kick-ass. Although I really am going to have to swap the hardware to all black, the chrome just looks too washed out on a blonde guitar.